![[personal profile]](https://www.dreamwidth.org/img/silk/identity/user.png) freshfeeling
freshfeelingThis update is based on gameplay from August 18th and 19th. We had previously saved outside of the Rift, which we had never entered yet.

Consequently, this mostly feels like a boss rush. The enemies here weren't hard in general; as a reminder and for some personal context, my team last year was berserker, chemist, dragoon, bard. My team this year was berserker, chemist, monk, ninja. With two classes in common, there's a lot that isn't that different. The berserker is either dead weight or a damage beast and doesn't really carry much strategy regardless, and chemist shows up late but can carry boss fights in a variety of ways. Bard and chemist have a lot of overlap in their usage, really. The big, shiny difference between these squads is the ninja, of course, who just makes random encounters much, much quicker. I can't say for sure which of these teams was easier but the ninja certainly made things feel quicker.

For Calofisteri, we put on Dragon Defense and then a couple of Dragon Blessings and crushed her with physical attacks.


Next was... Omega! I decided not to mess around and just get things done in order this time. I chose to just look at the little chart I made for my final update last year and use that, but I tried to keep the team alive and also brought Hermes Shoes instead of Reflect Rings - so the strategy was remixed somewhat.


Hermes Shoes relative to Reflect Rings is a tradeoff. Haste is nice, especially to help the team keep up with healing between (frequent) Surge Cannons, but we lose immunity to certain things like Delta Attack. Every time someone got knocked out or petrified - which happened a lot - we had to reapply Dragon Defense and Levisalve. This was... repetitive, and annoying, but it worked. With Turtle Soup and some level buffs in play my three attackers had nice, strong attacks.


There was a toll with the frequent Surge Cannon healing, though: my best healing was X-Potion, a mix using Potion + Ether. I found, of all things, eventually my stock of regular Potions was getting very, very low. It got to a point where I had to weigh the value of reviving and re-buffing Bartz the berserker and eventually chose not to. Being lean on healing also meant Lenna the chemist died shortly after. Whoops.

I decided at this point, since my damage output on monk Faris and ninja Krile had been so high, to just go all-in-on offense. Faris threw one more Hi-Potion at Krile to ensure she'd survive another Surge Cannon and then we just wailed on the Attack command.


This actually worked. On what was probably Krile's last action, she managed to defeat Omega with the rest of the team down.


This was great! First try, even.
In retrospect, I think it was a huge mistake to even bother buffing and healing Bartz the berserker for this fight: I am not sure he landed a single physical attack, and even if he did the contribution was negligible compared to what everyone else was doing. That was probably the single biggest strategic failure: it would've saved a lot of actions and consumables to focus on the more useful characters. Perhaps last year's strategy of accidentally soloing Omega wasn't a bad one.
Unfortunately because of all of the X-Potion use, I had just 4 Potions left and a few other consumables on the low side. I decided to exit and do one last trip to normal shops before beating the rest of the game.


Next boss! Apanda was really easy. I think we just pumped a few Dragon Blessings and beat him up.

We got the Thor Hammer in the next area. I decided to use it and just keep the berserker in the back row for the rest of the game so we could heal less often.
Against Azulmagia, I put some Reflect Rings on (possibly more in anticipation of Catastrophe) and did sort of the same thing: boosted levels through chemistry and then smashed him with physical attacks.


You can see from Azulmagia that I had already applied Levisalve. Consequently, with Reflect Rings on, Catastrophe didn't even attack. I used Kiss of Blessing on Krile to speed things up. It was literally the easiest fight in the game.


These regular bosses were pretty formulaic. I only got one screenshot of Halicarnassus and it was when they died. It was a very fast and simple fight.

Twintania has been a bit of a challenge for me in the past. I had the foresight to wear Coral Rings - which is probably more important than usual when you're fielding a berserker here.


After applying haste and some defensive chemistry, I pumped the attackers' levels a bit and then just let them go while Twintania healed us with water. For maybe my first time ever, I didn't even see Twintania go into the Gigaflare charge!

Gilgamesh 5 was no big deal. I failed to steal anything from him but meh.


I said I was going to do things more-or-less in order but I wanted Necrophobe's save point before finding Shinryu. I wasn't too afraid of Necrophobe because I sort of humiliated him last year. This year was similar: I Death Potion'd three of his barriers before he even started monologuing.


With a standard set of buffs, the rest of the fight was no problem. When my friend Gilgamesh 6 showed up, I even managed to steal his armor.


It happened that my team was level 43 (with no purposeful grinding besides accumulating Turtle Shells and Dragon Fangs earlier in the game) and that's a pretty nice level for Shinryu. Let's rush it.
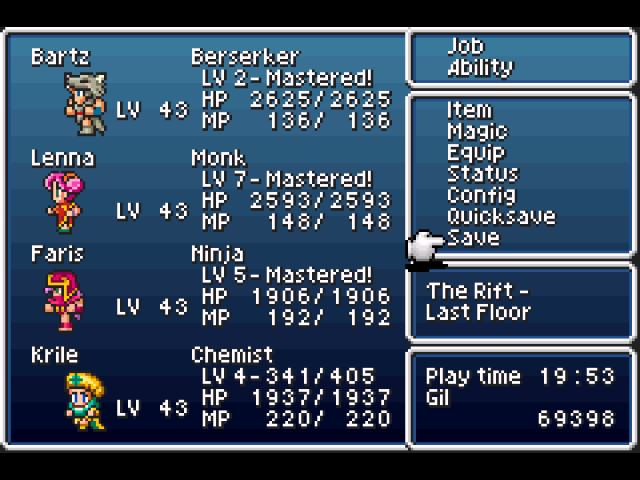
For the fight, I knew Krile the chemist wouldn't be able to contribute meaningfully with the Attack command at all, so I gave her a Main Gauche. The whole squad was also using Coral Rings.

The first attempt didn't go well, actually. Shinryu used a very successful Maelstrom as its first action after Tidal Wave, followed by Lightning before we could make ourselves immune to it.

The second attempt, however, was excellent. I followed a list not unlike last year so that I could make myself immune to everything he does except its very strong physical attacks. Speed Drink (Turtle + Eye Drop) for haste to keep up with the attacks, Goliath Tonic (Dragon Fang + Elixir, or Drink) to survive more easily while we get the elemental defenses up, Dragon Defense (Dragon Fang + Phoenix Down) for protect and shell status, Resist Ice (Phoenix Down + Antidote) so that we gain HP from Icestorm instead of losing it, Resist Thunder (Phoenix Down + Eye Drop) for similar but for Lightning...

...Lifeshield (Phoenix Down + Holy Water) and Dragon Kiss (Maiden Kiss + Dragon Fang) to negate Maelstrom and Roulette, and even Resist Poison (Ether + Antidote) to negate the weak Poison Breath attack, which did actually prove kind of annoying.
We tried applying Turtle Soup (Turtle Shell + Antidote) to reduce Shinryu's defenses but at least on GBA I don't know if it fails or just animates in a way that you can't see? I think maybe the tiny hammer in the animation might be appearing off the top of the screen because of Shinryu's large sprite. I also figured level 83 was also a safe level, so I gave each character 2 Dragon Blessing (Dragon Fang + Potion) mixes. The fight gets fun when you've applied all of this nonsense because you almost don't have to heal at all - and when you do, the best healing ends up being a Succubus Kiss.

We won! Once we'd done all of that chemistry the fight wasn't bad at all. Omega was considerably harder.

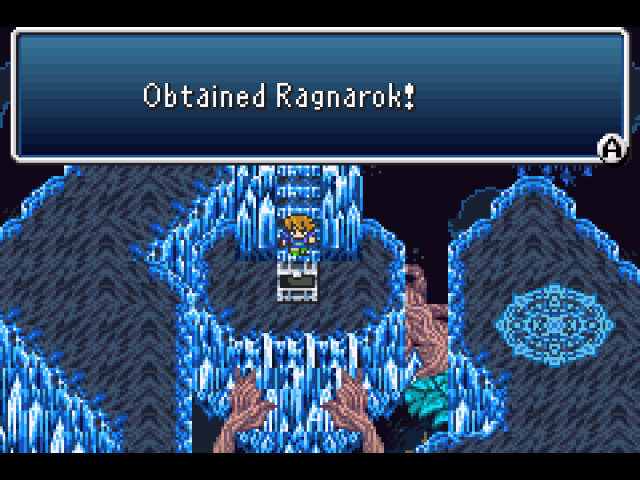
For the final battles, I figured I would basically tease him the exact same way. If I could get Lifeshield up, I could negate White Hole and neuter Exdeath's first phase, then buff to an extreme and steamroll the rest of the fight. That's exactly what I did. Against the very first stage of the fight, with Hermes Shoes on, we applied (in roughly this order): Lifeshield, Dragon Kiss, Dragon Defense, Goliath Tonic, Resist Ice, Resist Thunder, Resist Fire. The elemental resistances weren't very necessary: Exdeath's tree form doesn't use these at all, but one component of Neo Exdeath does. Before taking out Exdeath, we also pumped our level a ton: forgetting whether level caps at 99 or 255, I gave each team member at least 5 level boosts for at least 100 extra levels. The first form was... very simple.


Against Neo Exdeath, we weren't immune to everything: Vacuum Wave is still a pretty mean physical attack. Still, our healing needs were greatly mitigated, and we were very fast and strong. I had Bartz the chemist use the Magic Lamp a few times, figuring that using Odin to defeat the vulnerable target would be nice. The summon damage was also pretty nice despite our awful magic stats.


The elemental defenses I had set up were never relevant at all: we didn't experience a single Firaga, Thundaga or Blizzaga. That's a bit sad; absorbing attacks feels really satisfying.
One of the things we weren't immune to - that sort of surprised me - was Grand Cross. Faris ended up with a death sentence counter after the first one dropped.


I didn't recall whether Faris' heavy flag or Lifeshield status would negate the eventual death from condemnation, so the question to me at this point was: can I just kill this thing in 24 ticks?


It turns out, yes. That Succubus Kiss for 3068 was the finisher.

Bartz also ended up with a death sentence timer, but Faris still had 8 seconds on hers. I may have said this before, but this might've been the easiest Neo Exdeath fight I've ever had. The only touch of tension came from that countdown to (possible?) death.
Last year was my first time leaning heavily into chemist abuse, and this year... well, I got a little bit more used to it. I've heard a lot of people say chemist is a pretty broken job and I think I agree with that more than ever now. I don't love the way monk tapers off so much in the second half of this game, but otherwise I liked this team more than last year's. A monk with its level inflated by a chemist or bard is still a pretty fierce combatant! The one thing I truly missed from last year, strangely, was Equip Harps - which is frankly just an amazing secondary skill for berserkers giving them a substantial boost to both agility and magic. My berserker was noticeably less effective without Equip Harps.


Maybe in some future year I'll roll berserker, bard, and two non-chemists. That feels like it could be interesting.
I guess now we'll refocus on the Final Fantasy VI Ban Something playthrough.
<< First | < Previous | Index
Consequently, this mostly feels like a boss rush. The enemies here weren't hard in general; as a reminder and for some personal context, my team last year was berserker, chemist, dragoon, bard. My team this year was berserker, chemist, monk, ninja. With two classes in common, there's a lot that isn't that different. The berserker is either dead weight or a damage beast and doesn't really carry much strategy regardless, and chemist shows up late but can carry boss fights in a variety of ways. Bard and chemist have a lot of overlap in their usage, really. The big, shiny difference between these squads is the ninja, of course, who just makes random encounters much, much quicker. I can't say for sure which of these teams was easier but the ninja certainly made things feel quicker.
For Calofisteri, we put on Dragon Defense and then a couple of Dragon Blessings and crushed her with physical attacks.
Next was... Omega! I decided not to mess around and just get things done in order this time. I chose to just look at the little chart I made for my final update last year and use that, but I tried to keep the team alive and also brought Hermes Shoes instead of Reflect Rings - so the strategy was remixed somewhat.
Hermes Shoes relative to Reflect Rings is a tradeoff. Haste is nice, especially to help the team keep up with healing between (frequent) Surge Cannons, but we lose immunity to certain things like Delta Attack. Every time someone got knocked out or petrified - which happened a lot - we had to reapply Dragon Defense and Levisalve. This was... repetitive, and annoying, but it worked. With Turtle Soup and some level buffs in play my three attackers had nice, strong attacks.
There was a toll with the frequent Surge Cannon healing, though: my best healing was X-Potion, a mix using Potion + Ether. I found, of all things, eventually my stock of regular Potions was getting very, very low. It got to a point where I had to weigh the value of reviving and re-buffing Bartz the berserker and eventually chose not to. Being lean on healing also meant Lenna the chemist died shortly after. Whoops.
I decided at this point, since my damage output on monk Faris and ninja Krile had been so high, to just go all-in-on offense. Faris threw one more Hi-Potion at Krile to ensure she'd survive another Surge Cannon and then we just wailed on the Attack command.
This actually worked. On what was probably Krile's last action, she managed to defeat Omega with the rest of the team down.
This was great! First try, even.
In retrospect, I think it was a huge mistake to even bother buffing and healing Bartz the berserker for this fight: I am not sure he landed a single physical attack, and even if he did the contribution was negligible compared to what everyone else was doing. That was probably the single biggest strategic failure: it would've saved a lot of actions and consumables to focus on the more useful characters. Perhaps last year's strategy of accidentally soloing Omega wasn't a bad one.
Unfortunately because of all of the X-Potion use, I had just 4 Potions left and a few other consumables on the low side. I decided to exit and do one last trip to normal shops before beating the rest of the game.
Next boss! Apanda was really easy. I think we just pumped a few Dragon Blessings and beat him up.
We got the Thor Hammer in the next area. I decided to use it and just keep the berserker in the back row for the rest of the game so we could heal less often.
Against Azulmagia, I put some Reflect Rings on (possibly more in anticipation of Catastrophe) and did sort of the same thing: boosted levels through chemistry and then smashed him with physical attacks.
You can see from Azulmagia that I had already applied Levisalve. Consequently, with Reflect Rings on, Catastrophe didn't even attack. I used Kiss of Blessing on Krile to speed things up. It was literally the easiest fight in the game.
These regular bosses were pretty formulaic. I only got one screenshot of Halicarnassus and it was when they died. It was a very fast and simple fight.
Twintania has been a bit of a challenge for me in the past. I had the foresight to wear Coral Rings - which is probably more important than usual when you're fielding a berserker here.
After applying haste and some defensive chemistry, I pumped the attackers' levels a bit and then just let them go while Twintania healed us with water. For maybe my first time ever, I didn't even see Twintania go into the Gigaflare charge!
Gilgamesh 5 was no big deal. I failed to steal anything from him but meh.
I said I was going to do things more-or-less in order but I wanted Necrophobe's save point before finding Shinryu. I wasn't too afraid of Necrophobe because I sort of humiliated him last year. This year was similar: I Death Potion'd three of his barriers before he even started monologuing.
With a standard set of buffs, the rest of the fight was no problem. When my friend Gilgamesh 6 showed up, I even managed to steal his armor.
It happened that my team was level 43 (with no purposeful grinding besides accumulating Turtle Shells and Dragon Fangs earlier in the game) and that's a pretty nice level for Shinryu. Let's rush it.
For the fight, I knew Krile the chemist wouldn't be able to contribute meaningfully with the Attack command at all, so I gave her a Main Gauche. The whole squad was also using Coral Rings.
The first attempt didn't go well, actually. Shinryu used a very successful Maelstrom as its first action after Tidal Wave, followed by Lightning before we could make ourselves immune to it.
The second attempt, however, was excellent. I followed a list not unlike last year so that I could make myself immune to everything he does except its very strong physical attacks. Speed Drink (Turtle + Eye Drop) for haste to keep up with the attacks, Goliath Tonic (Dragon Fang + Elixir, or Drink) to survive more easily while we get the elemental defenses up, Dragon Defense (Dragon Fang + Phoenix Down) for protect and shell status, Resist Ice (Phoenix Down + Antidote) so that we gain HP from Icestorm instead of losing it, Resist Thunder (Phoenix Down + Eye Drop) for similar but for Lightning...
...Lifeshield (Phoenix Down + Holy Water) and Dragon Kiss (Maiden Kiss + Dragon Fang) to negate Maelstrom and Roulette, and even Resist Poison (Ether + Antidote) to negate the weak Poison Breath attack, which did actually prove kind of annoying.
We tried applying Turtle Soup (Turtle Shell + Antidote) to reduce Shinryu's defenses but at least on GBA I don't know if it fails or just animates in a way that you can't see? I think maybe the tiny hammer in the animation might be appearing off the top of the screen because of Shinryu's large sprite. I also figured level 83 was also a safe level, so I gave each character 2 Dragon Blessing (Dragon Fang + Potion) mixes. The fight gets fun when you've applied all of this nonsense because you almost don't have to heal at all - and when you do, the best healing ends up being a Succubus Kiss.
We won! Once we'd done all of that chemistry the fight wasn't bad at all. Omega was considerably harder.
For the final battles, I figured I would basically tease him the exact same way. If I could get Lifeshield up, I could negate White Hole and neuter Exdeath's first phase, then buff to an extreme and steamroll the rest of the fight. That's exactly what I did. Against the very first stage of the fight, with Hermes Shoes on, we applied (in roughly this order): Lifeshield, Dragon Kiss, Dragon Defense, Goliath Tonic, Resist Ice, Resist Thunder, Resist Fire. The elemental resistances weren't very necessary: Exdeath's tree form doesn't use these at all, but one component of Neo Exdeath does. Before taking out Exdeath, we also pumped our level a ton: forgetting whether level caps at 99 or 255, I gave each team member at least 5 level boosts for at least 100 extra levels. The first form was... very simple.
Against Neo Exdeath, we weren't immune to everything: Vacuum Wave is still a pretty mean physical attack. Still, our healing needs were greatly mitigated, and we were very fast and strong. I had Bartz the chemist use the Magic Lamp a few times, figuring that using Odin to defeat the vulnerable target would be nice. The summon damage was also pretty nice despite our awful magic stats.
The elemental defenses I had set up were never relevant at all: we didn't experience a single Firaga, Thundaga or Blizzaga. That's a bit sad; absorbing attacks feels really satisfying.
One of the things we weren't immune to - that sort of surprised me - was Grand Cross. Faris ended up with a death sentence counter after the first one dropped.
I didn't recall whether Faris' heavy flag or Lifeshield status would negate the eventual death from condemnation, so the question to me at this point was: can I just kill this thing in 24 ticks?
It turns out, yes. That Succubus Kiss for 3068 was the finisher.
Bartz also ended up with a death sentence timer, but Faris still had 8 seconds on hers. I may have said this before, but this might've been the easiest Neo Exdeath fight I've ever had. The only touch of tension came from that countdown to (possible?) death.
Last year was my first time leaning heavily into chemist abuse, and this year... well, I got a little bit more used to it. I've heard a lot of people say chemist is a pretty broken job and I think I agree with that more than ever now. I don't love the way monk tapers off so much in the second half of this game, but otherwise I liked this team more than last year's. A monk with its level inflated by a chemist or bard is still a pretty fierce combatant! The one thing I truly missed from last year, strangely, was Equip Harps - which is frankly just an amazing secondary skill for berserkers giving them a substantial boost to both agility and magic. My berserker was noticeably less effective without Equip Harps.
Maybe in some future year I'll roll berserker, bard, and two non-chemists. That feels like it could be interesting.
I guess now we'll refocus on the Final Fantasy VI Ban Something playthrough.
<< First | < Previous | Index


